
File storage
Description
In one of updates, for security reasons, we removed the ability for users to upload files. This created inconvenience during verification and uploading of documents. We do not plan to return the ability for users to upload files to your server. File storage can be used to allow users to upload files. Currently using Yandex.Disk and Dropbox
Yandex.Disk settings
Login to your Yandex account.
Create an application. Follow the link: https://oauth.yandex.ru/client/new
Name - Any. for example: Files
Platforms - Web services and click Substitute URL for development

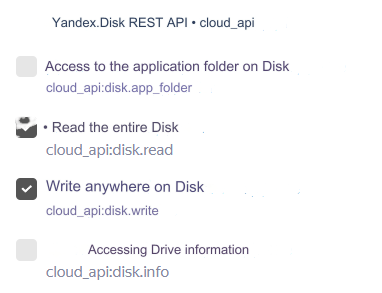
Access - Yandex.Disk REST API and check Write anywhere on the Disk, Read the entire Disk
Click Create application
You will see the following:
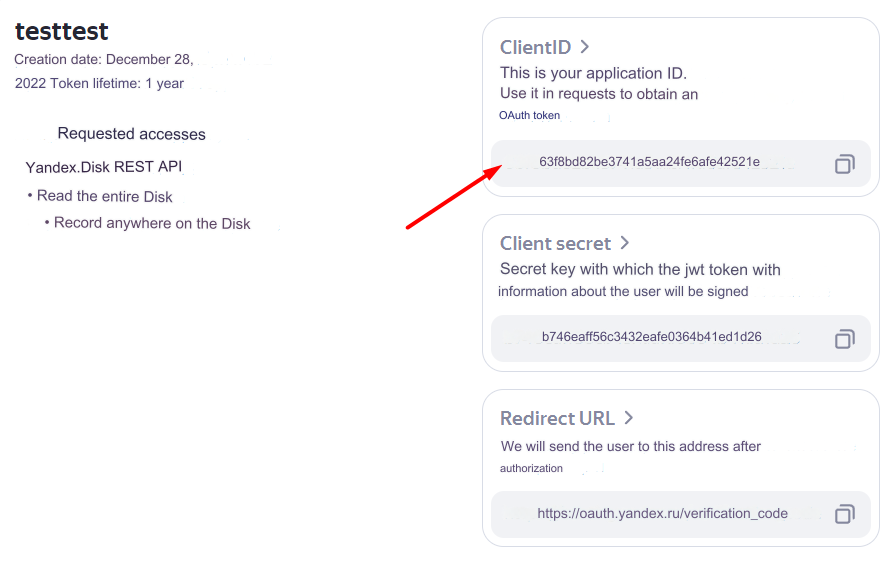
We will need a ClientID. Copy it and save.
Add the resulting ClientID to the end of this link: https://oauth.yandex.ru/authorize?response_type=token&client_id=
In our example, the link will look like this: https://oauth.yandex.ru/authorize?response_type=token&client_id=63f8bd82be3741a5aa24fe6afe42521e
Your ClientID will be different.
Click on your compiled link. You will see the following:
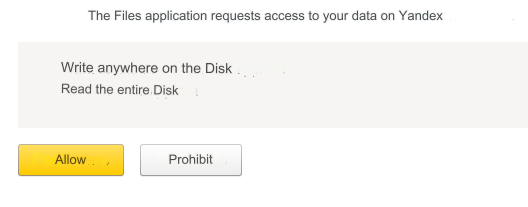
Click Allow
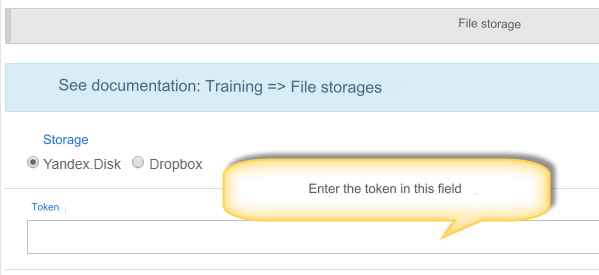
And get your Token, which you need to enter in the admin panel in the section: Settings - Configuration - File storage - Yandex.Disk - Token
Dropbox Settings
Register and log in to your Dropbox account (https://www.dropbox.com/)
Create an application: https://www.dropbox.com/developers/apps/create
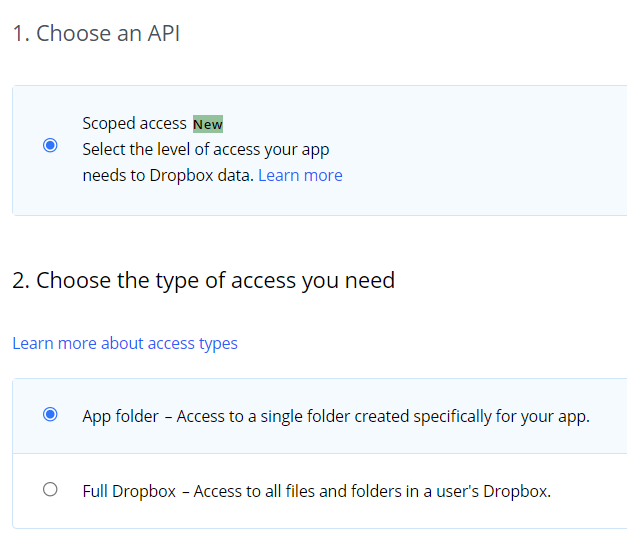
1. Choose an API - select Scoped access
2. Choose the type of access you need - select App folder
3. Name your app - optional. For example: Verification
4. Create an application by clicking on the Create app button
After creating the application, you are taken to its settings page. If this does not happen, go to the list of your applications and click on the one you need:
https://www.dropbox.com/developers/apps
On the diligence settings page, go to the Permissions tab
Select the following items: files.content.write, files.content.read, sharing.write and click submit< /i>
Return to the Settings tab, in the OAuth2 option, find the Access token expiration setting and select No expirationNext to the previous setting, find Generated access token and click Generate You can change the rest of the settings at your discretionEnter the received token in the admin panel in the section: Settings - Configuration - File storage - Dropbox - Token
Last updated